Inhaltsverzeichnis

Pictures are in German!!!
(remove this paragraph once the translation is finished)
Microsoft Outlook as HS.R Exchange Client
Inhaltsverzeichnis
Set up your mailbox
1. Open Microsoft Outlook.
2. If you are opening Outlook for the first time you may see the following screen. Click twice forward to go ahead.

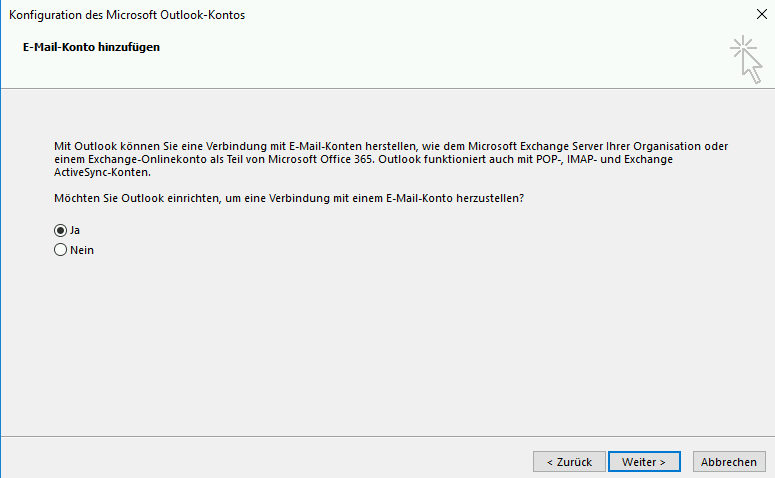
3. If you are using more than one E-Mail Address with your Outlook we recommend to create an additional profile. This shows you how to do this. start > control panel > Mail > Show Profiles > Email Accounts > Add > Enter a new Profile Name and click ok (Note: The new profile should be marked as standartprofile)
4. If the account assistant filled in your Name and Email correctly, you don't need to take any further steps. If the fields are empty or you want to change your user data, please add or change following fields (please delete every character in the fields):
- Name of the user
- Email address - Important: Use your hs-regensburg.de or oth-regensburg.de address. (Students use: @stud.hs-regensburg.de or @st.oth-regensburg.de, Externals: @extern.hs-regensburg.de bzw. @extern.oth-regensburg.de).
- Password of your user (RZ-Password)
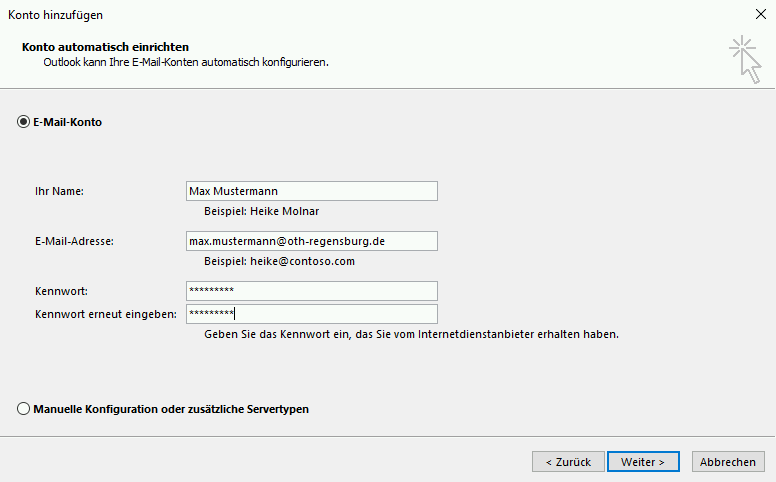
If you click forward the assistant search for the right serversettings.
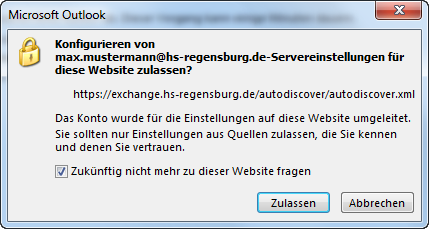
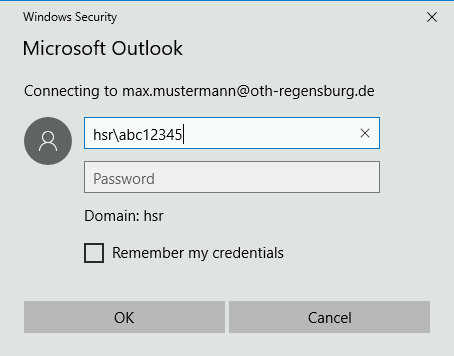
5. Maybe on the next screen you need to confirm the configuration URL and enter your username and password.
6. The successful account setup is done by clicking „finish“:
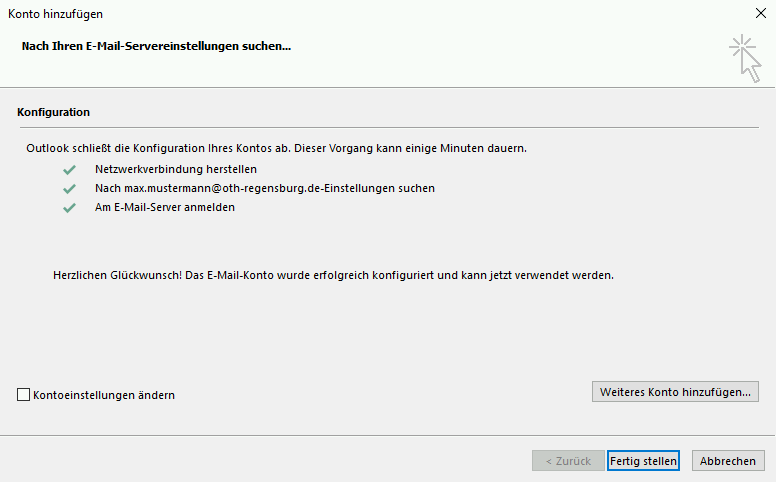
7. Microsoft Outlook is only usable with the Exchange Account. Outlook may ask for your username and password after start. Please enter the known data from step 5.
Add additional mailbox
1. Please open account settings by clicking „File → Account Settings → Account Settings…“
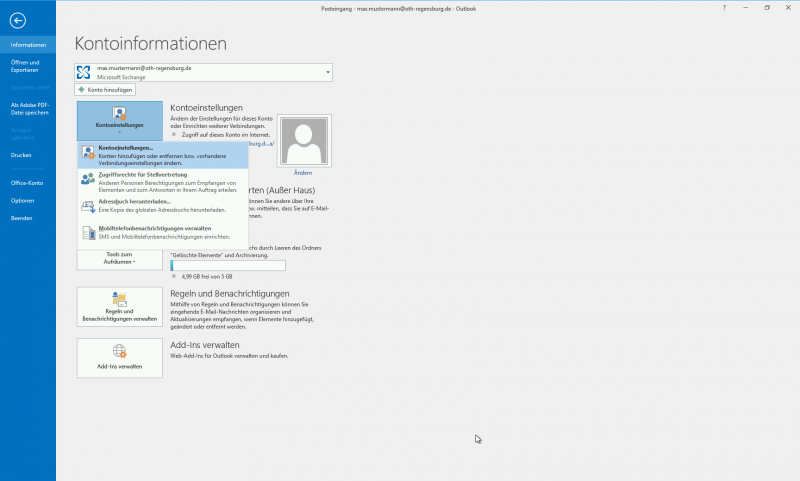
2. Choose your exchange account and click change. Now click „More Settings“, on tab „Advanced“ you can add function recognition Wählen Sie Ihr Exchange Konto und klicken Sie auf „Ändern…“ und im folgenden Dialogfeld dann auf „Weitere Einstellungen“. Im Register „Erweitert“ können nun die Funktionskennungen über einen Klick auf „Hinzufügen…“ zur Anzeige in Outlook hinzugefügt werden:
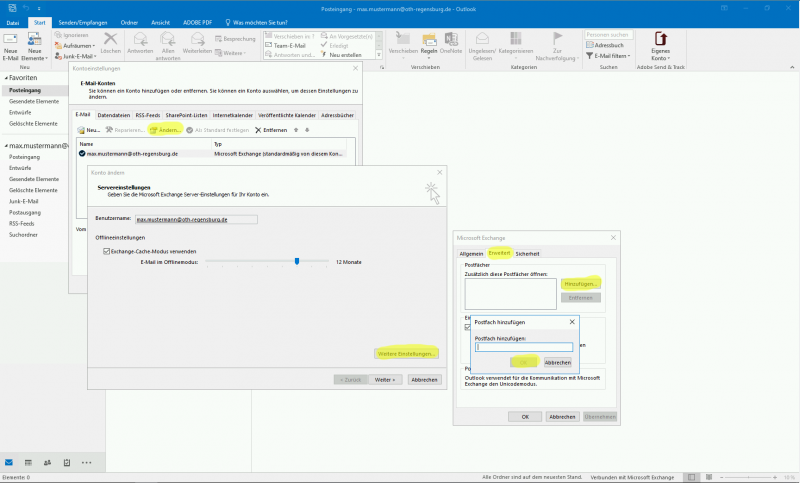
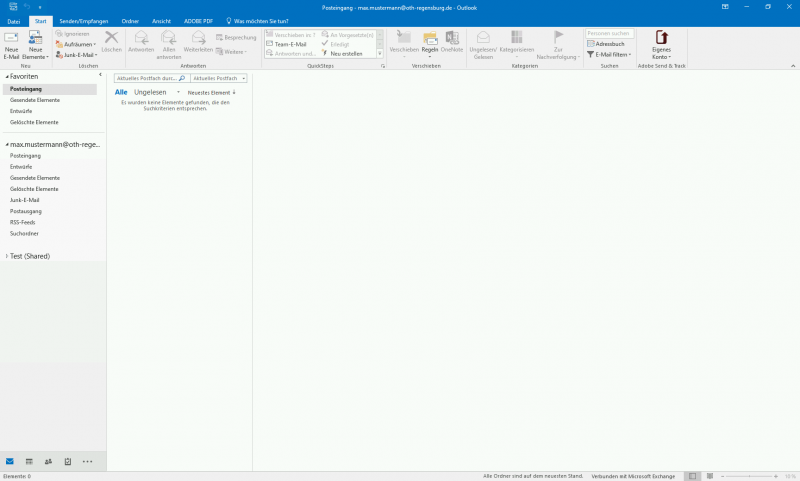
3. After a click on „Ok → Ok → Next… → Complete → Close“ the function mailbox appears as an additional mailbox in Outlook :
Further Instructions
Change of font in Microsoft Outlook
The following link describes how you can change the default font:
Changing the default font or text color for email messages
Note: This setting is saved locally. That means it must be done at every Computer you want to work on.
Recovery deleted elements
You find a detailed instruction of the recovery process at the online documentation of Microsoft at: https://support.office.com/en-us/article/Recover-deleted-items-in-Outlook-for-Windows-49e81f3c-c8f4-4426-a0b9-c0fd751d48ce?ui=en-US&rs=en-001&ad=US
Possible solutions of problems by use of Exchange with Outlook
repair Exchange Account
Several problems in conjunction with the Exchange Server can be solved in a relatively simple way by use of account repair in Account Settings:
- In Outlook, click File.
- Click the down-arrow next to Account Settings, then click Account Settings.
- On the Email tab, select your account profile, and click Repair.
- Complete the wizard and restart Outlook.
Use Exchange Online-Modus
Activate Online-Modus:
- Click File > Account Settings > Account Settings.
- Click the Exchange account, and then click Change.
- Under Offline Settings, clear Use Cached Exchanged Mode
If you want to turn off Cached Exchange Mode, repeat the steps, but check Use Cached Exchange Mode.
Known issues by use of Microsoft Outlook
Message sending problems
Email stuck in the Outbox
Please use the Cached Modus and send the Message again. Is it not working, then recreate your Outlook Profile.
Unknown recipient / Address not found
You get one of the following error notification by sending an message with Outlook to an recipient (per Email or direct):
- '<recipientname>'
Non of your Email Accounts can send messages to this recipient. - '<recipientname>' <mailto:IMCEAEX-….
The address entered could not be found.
The problem occurs because of a wrong address book entry in your Outlookclient.
Solution:
Please delete the address book entry and add a new one. Use the global address book (or the list „Every User“) in your Outlook Client. If this don't solve the problem create a new outlookprofile.
Additional mailbox: Emailsending cause errormail with errormessage 0x80070005-00000000-00000000
This problem occurs if you use an old cached address in from field. To solve this problem delete the cached entry (click the x behind) and add the from adress from the adressbook.
Every Login required password
Delete the Exchange passwordentries in the Windows Vault (Windows 7)
Being ask for your password is quite normal as you didn't check save password. Though you get asked about your password continuously, there is a problem with Windows Vault. Deleting the saved entries from the vault for the Exchange Server can be helpfull. After deleting Outlook should ask once again for the username the password.
- Open Systemsettings
- Click Login Information (possible change to symbolview)
- Delete all entries for server exchange.hs-regensburg.de
Set the right authentication method (Exchange 2016 and Outlook 2010)
With a Exchange 2013 Account could it be possible to get problems with email account from older exchange versions (especially additional mailboxes). This is caused by wrong authentication method and should be solved by following steps:
- Open systemsettings, Outlook should be closed.
- Choose Email and Email Account
- Choose your Exchange Account and click change
- Click more settings and choose the tab security
- Set „Negotiate Authentication“ under logon network security and put the hook on „Encrypt data between Microsoft Outlook and Microsoft Exchange“
- Switch to the tab „Connection“ and click on „Exchange Proxy Settings…“
- Change the proxy authentication settings to „Negotiate Authentication“
- Close all windows by clicking on „Ok“ or „Next…“ to save the changes
Entries in the Folder "Sync Issues "
These entries are automatically created by Microsoft Outlook in case of problems with the synchronization with the Exchange Server. If there are many entries, please check the synchronization status via the OWA. If you do not notice any deviations, the entries are erroneous / outdated information, you can automatically delete them using an Outlook rule.
Issues with Permissions and Calendar Sharing
If there are problems with assigning permissions/ calendar sharing to specific contacts, or if they are not possible, it is due to an incorrect entry in the user's local address book being used. You will only be able to access functioning permissionsand calendar releases with users from the Exchange Server's Global Address List , which must be selected as an address book in the respective dialog ( „All Users“ or „Global Address List“ ). Thereafter, an allocation of permissions and shares should be readily possible.
